There are many restorative options available but we all need to know which one to choose and which one is right for the patient. Of course, there is a cost factor involved. I believe we need to provide patients with enough information before they make a decision.
Many doctors ask the dental labs to help them to choose the right restoration for the patient, but this may be their biggest mistake since the labs cannot always make the right choice. Ideally, doctors and labs must have good communication in order to combine their knowledge in the best interest of the patient.
Nowadays, with the advance technology and materials the most popular choice would be screw retained zirconia restorations. Depending on the desired outcome, some cases may require porcelain buildup on anterior or gingival region. I use composite to restore the desired effect for gums, since I found it has good bond to zirconia. I also found that the biggest advantage of this material is the possibility of reline after years of use, in case the patient suffers gingival recession (gum loss).
Impressions
First of all, you need to decide between open tray and closed tray impression copings over multi-unit abutments. If you decide to make an impression with open tray impression copings you skip one appointment of the verification jig. By taking impression with an open tray you must connect and cure with flowable composite the impression transfers to avoid any possible movement. Close tray impressions are done in the traditional manner.
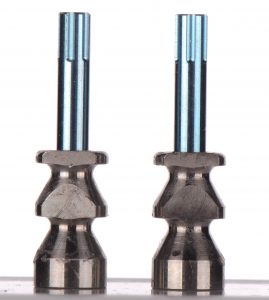
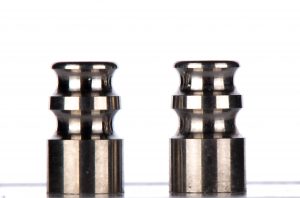
Open tray impression coping Close tray impression coping
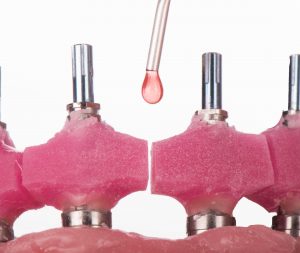
Verification Jig
The jig is a requisite part in case you chose an open tray impression technique. After installing all the jig parts in place we connect them with light cure material. Then we fill the space between the jig and the gums with light body impression material. By using pre-made custom tray we take the impression with the jig.
Bite Block
I design my own bite blocks with two pieces that you don’t need to screw and unscrew each tome you need to adjust it. You just screw the base and place the removable wax rim on top. Of course, we mark indicators: one of the very helpful parts is a Q-tip as it helps to analyze the occlusal plane and is places parallel to the eyes.
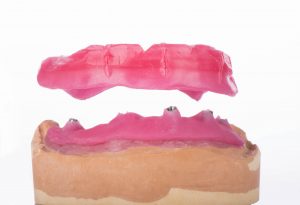
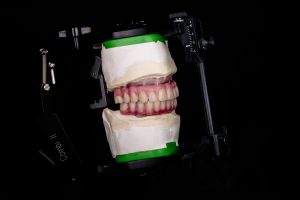
Setup try-in
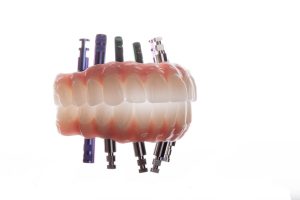
The setup for try-in must be screw retained to avoid any possible discrepancies between the model and the mouth, and movements. Few essential aspects that are crucial to verify during the try-in period:
- Shape of the teeth
- Occlusal line
- Smile line
- Lip support
- Bite
The shade of the teeth isn’t a major concern at this moment, because the bridge will be scanned and milled from a different material. Usually, during the try-in the teeth sit on a bigger hard base to prevent breakage at the insertion.
PMMA
An integral part of this process is PMMA, or as we call it – test drive. Why do we make the PMMA? This step allows us to make final adjustments and let the patient wear it for two-three weeks to understand what bothers them and to let the doctor know. After all corrections are made, the PMMA should be removed and sent back to the lab.
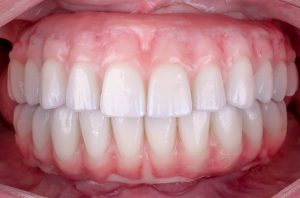
Final Insertion
The insertion has to take approximately 15-20 min. Thanks to the PMMA all the adjustments are made on a plastic bridge and then scanned and milled in zirconia. As I mentioned earlier, I like the idea of composite in a gum region because it is easy to add, remove or reline at any time.
Maintenance
We suggest to invite the patient for his first follow-up in 1-2 weeks after the insertion. We want to hear the complaints, if there are any, and to see how the bridge adapts to the gum area. Also, we’d like to check the bite.
Regular follow-ups should be scheduled every six months. These follow-ups are for cleaning, but not polishing the bridge or the gum area. By polishing theses areas you are risking to remove the glaze or the stain from the teeth or distort the contour of the gingival composite. There is no need to unscrew the bridge for every cleaning, only if you see inflammatory process around it.
We strongly recommend patients to use water pick and to brush their teeth regularly with a soft tooth brush.
